How to set up SSO integration with Okta
Preprequisites
- http://okta.com/ account, admin access to that account
- See also How to set up SSO integration with your IdP.
Steps
Okta setup
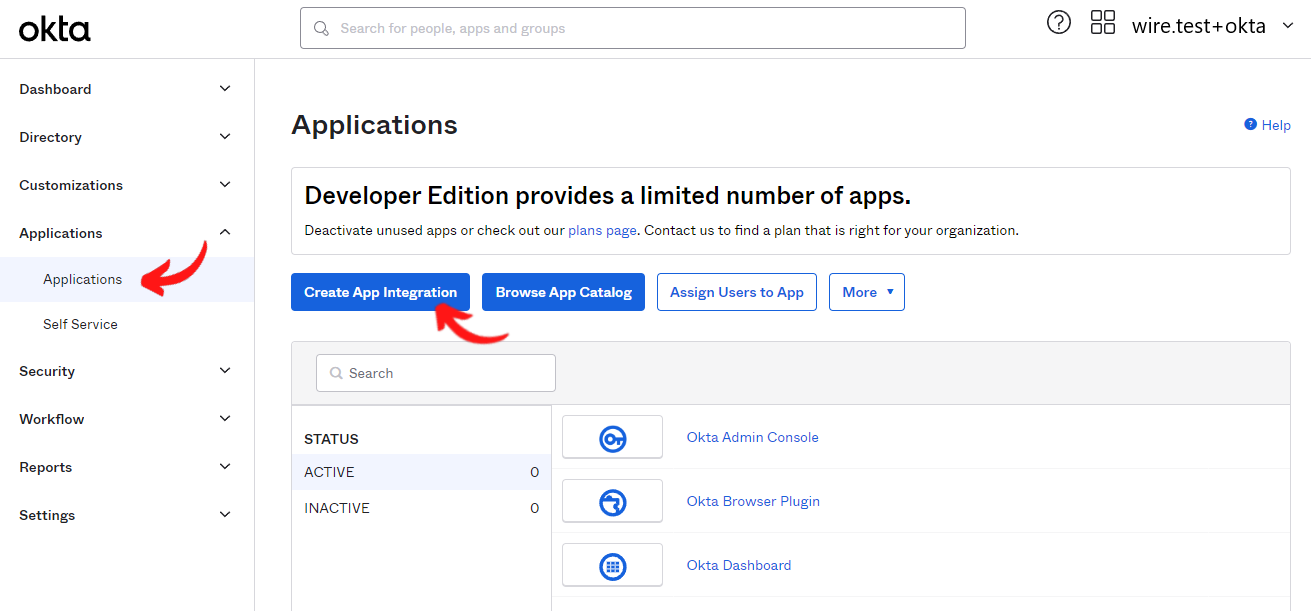
- Log in into Okta web interface
- Navigate to “Applications”
- Click “Create App Integration”
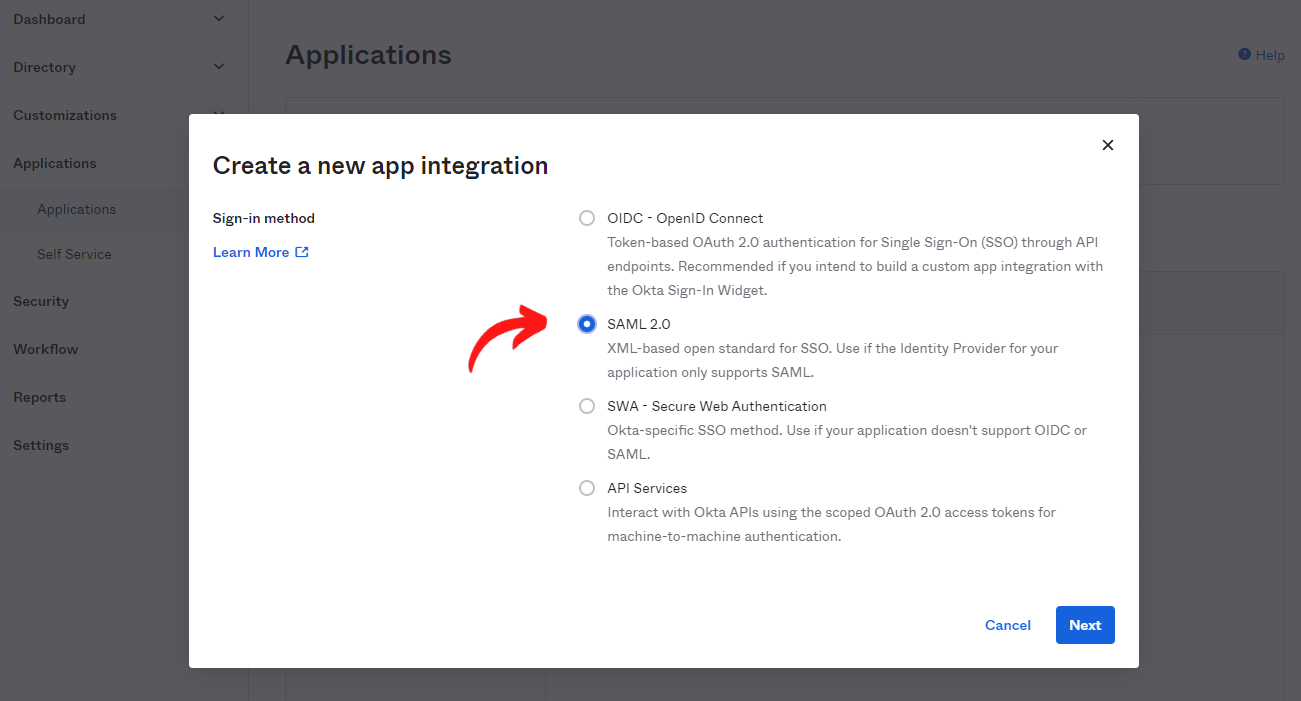
- Choose
SAML 2.0
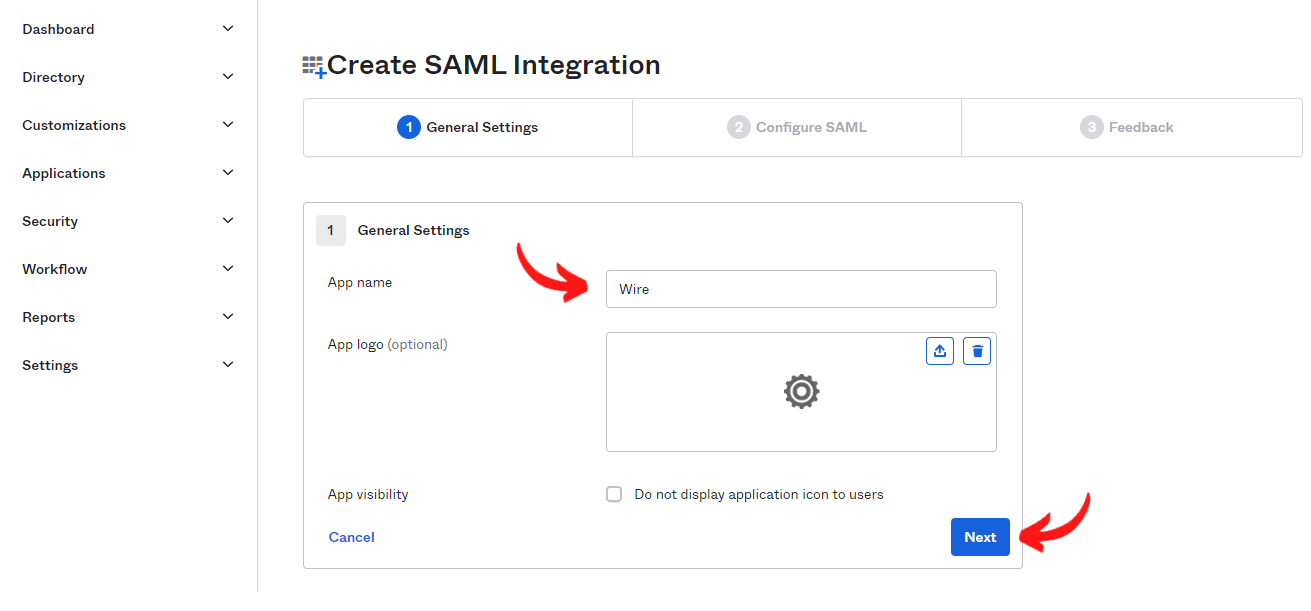
- Pick a name for the application in “Step 1” and continue
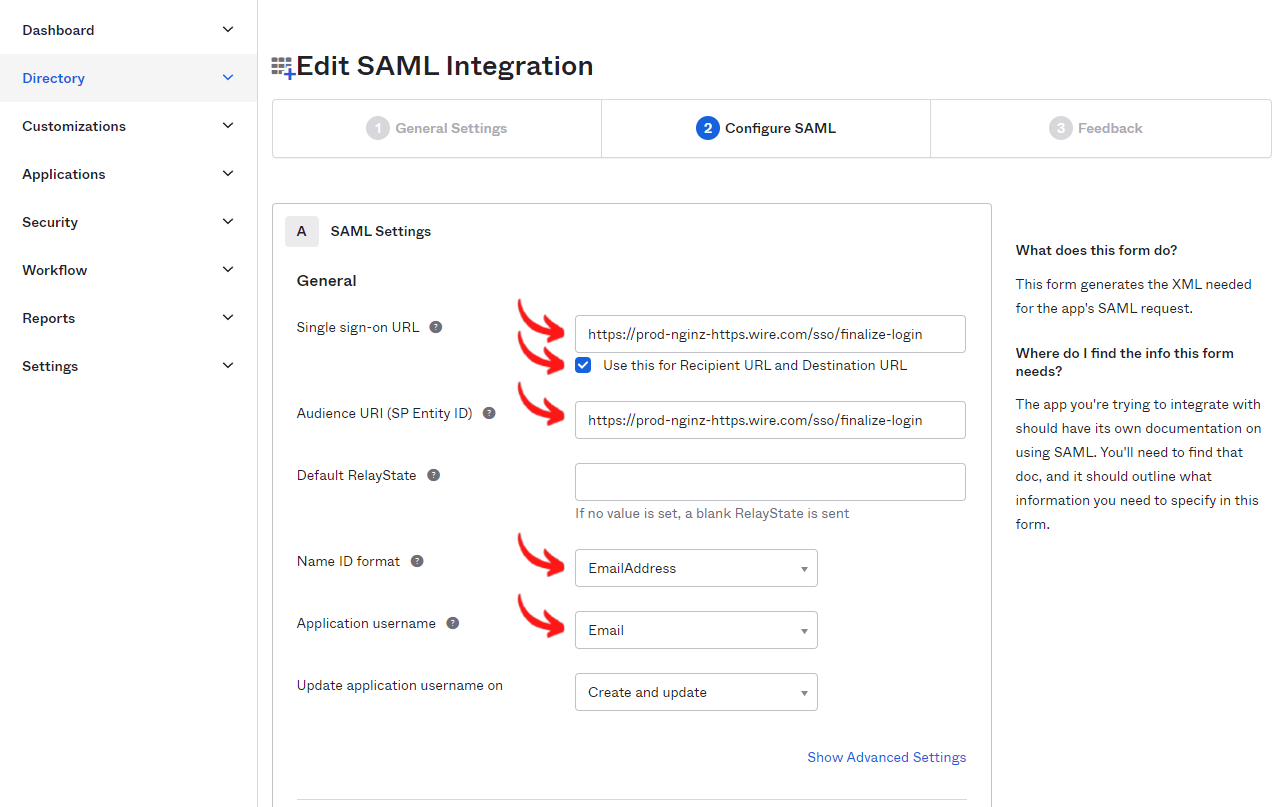
- Add the following parameters in “Step 2” and continue
| Paramenter label | Value |
|---|---|
| Single Sign On URL | https://prod-nginz-https.wire.com/sso/finalize-login |
| Use this for Recipient URL and Destination URL | checked |
| Audience URI (SP Entity ID) | https://prod-nginz-https.wire.com/sso/finalize-login |
| Name ID format | EmailAddress (*) |
| Application Username | Email (*) |
(*) Note: The application username must be unique in your team, and should be immutable once assigned. If more than one user has the same value for the field that you select here, those two users will log in as a single user on Wire. And if the value were to change, users will be re-assigned to a new account at the next login. Usually, email is a safe choice but you should evaluate it for your case.
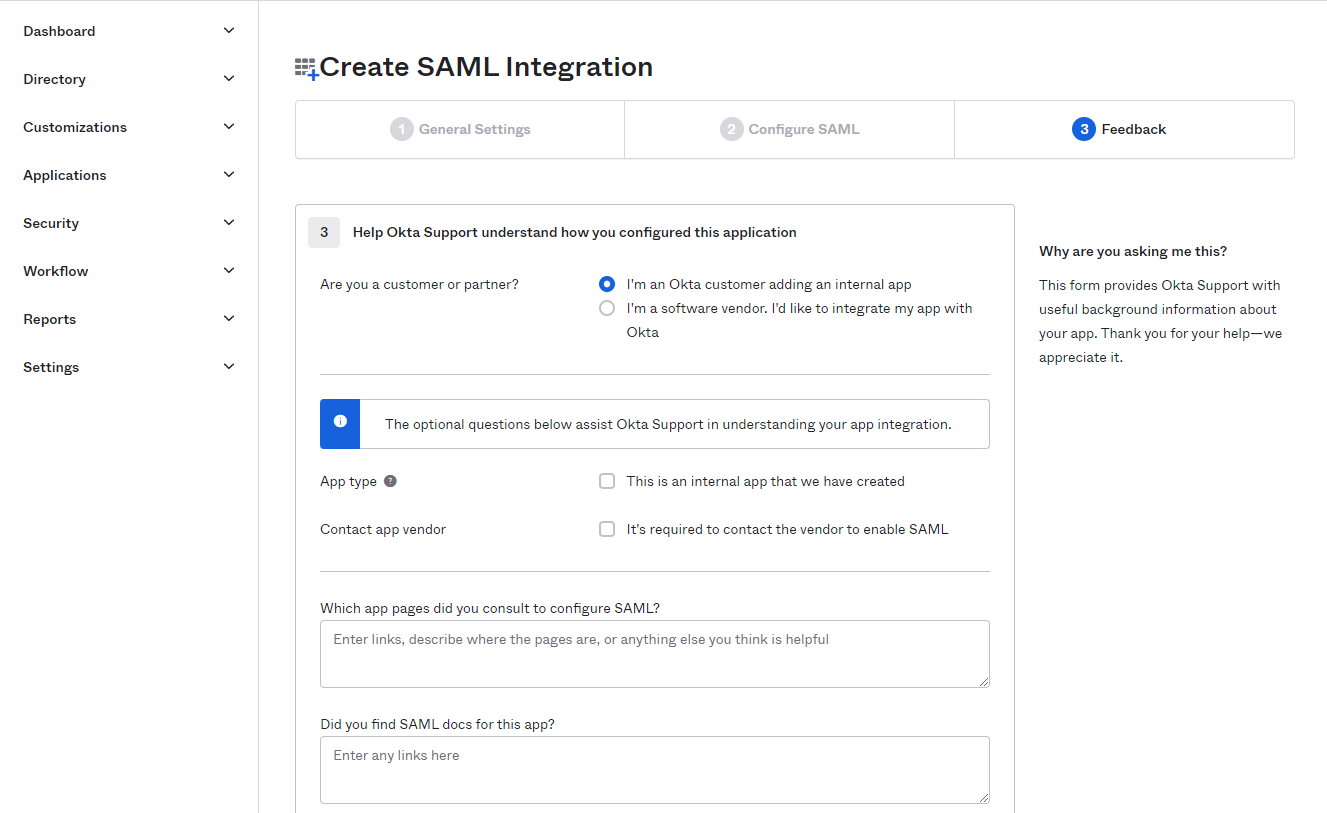
- Give the following answer in “Step 3” and continue
| Paramenter label | Value |
|---|---|
| Are you a customer or a partner? | I’m an Okta customer |
 |
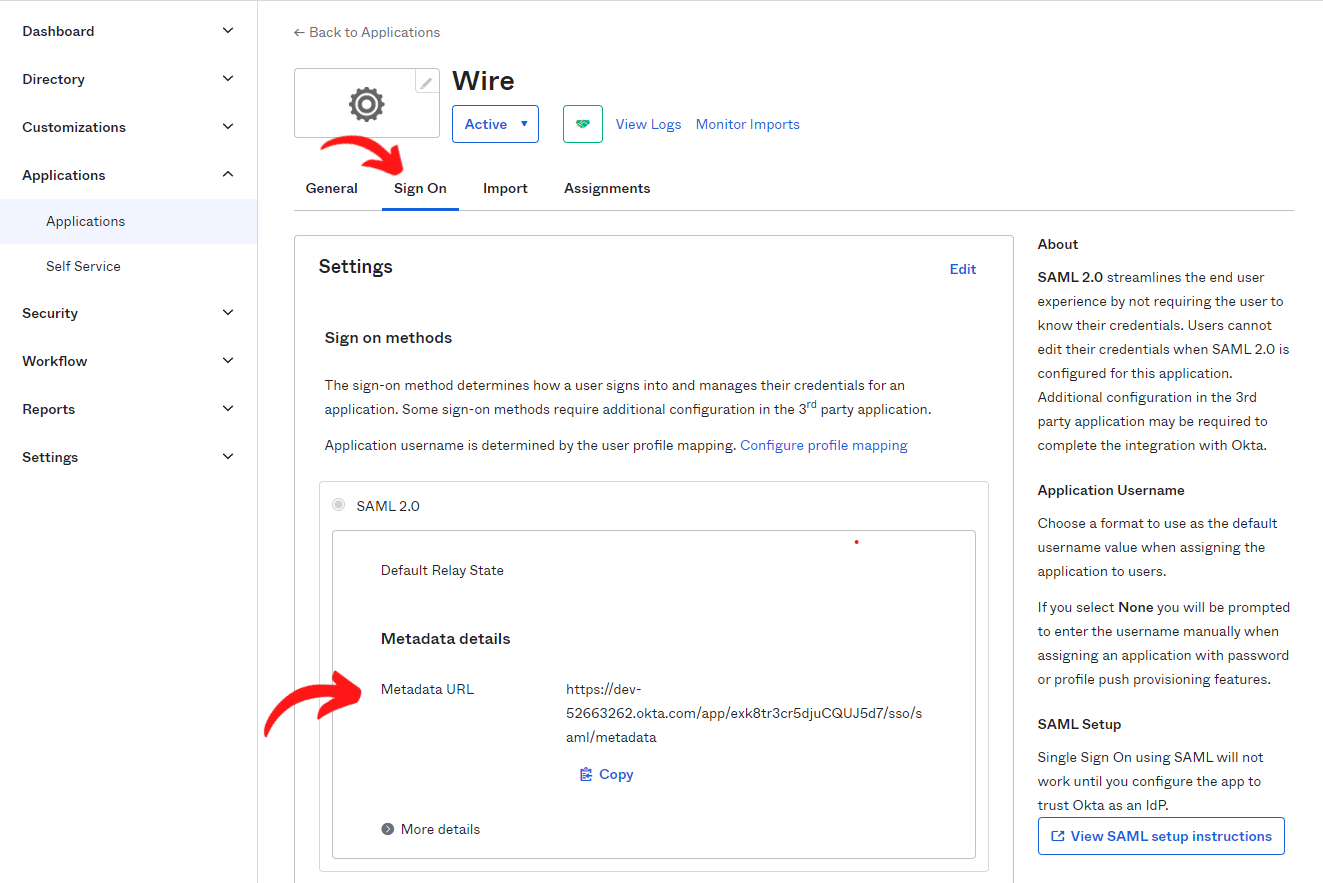
- The app has been created. Switch to the “Sign-On” tab
- Find the “Identity Provider Metadata” link. Copy the link address (normally done by right-clicking on the link and selecting “Copy link location” or a similar item in the menu).
- Store the link address somewhere for a future step.
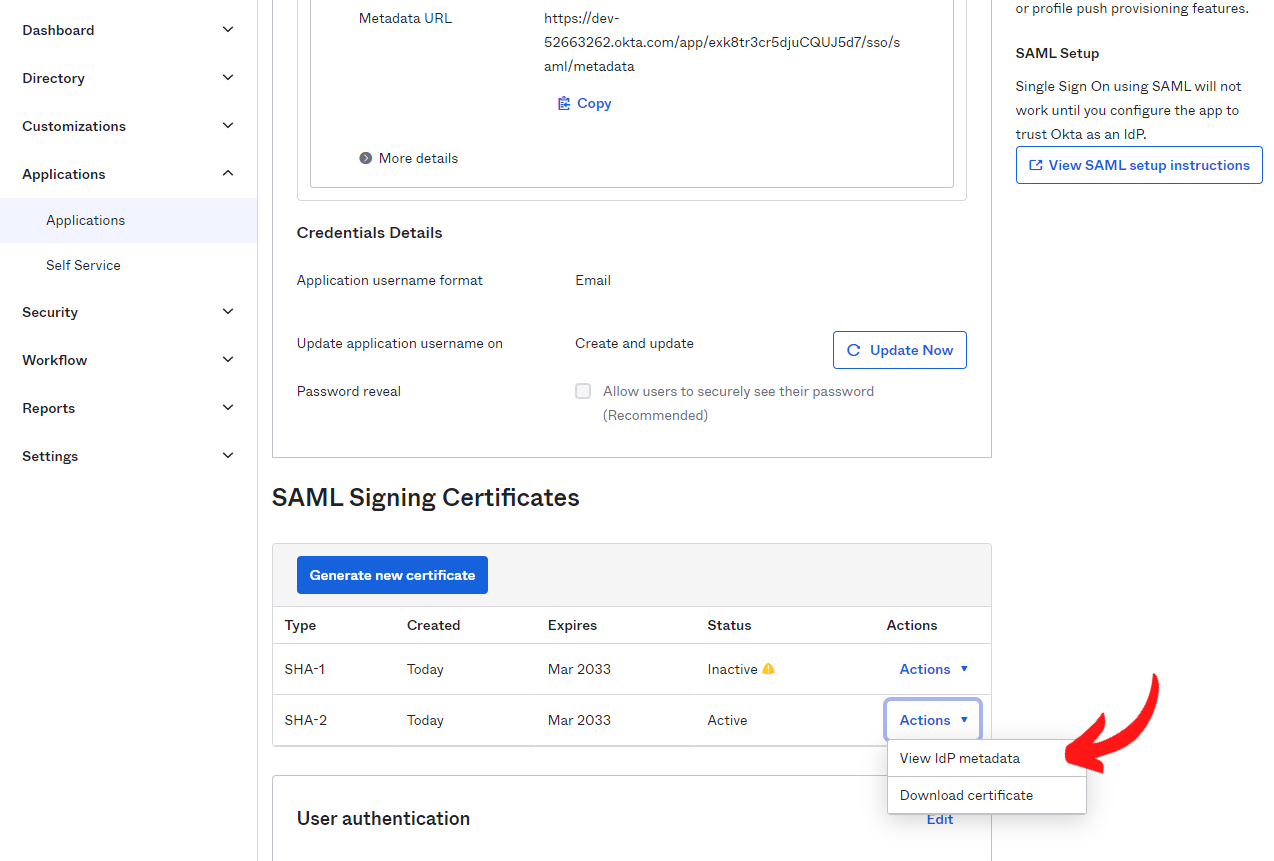
- In the case you are looking for Download of IdP Metadata and SAML Signing Certificates.
- Under “Sign-On” tab, find (scroll down) SAML Signing Certificates section.
- Click the Actions button next to the certificate.
- Choosing View IdP metadata opens a new browser tab containing the metadata, you can then right-click the metadata and save it as a (.xml) file.
- Choosing Download certificate will automatically save the certificate as a file.
(*) Note: To provide IdP metadata in Wire’s Team Settings, file has to be saved as .xml file.
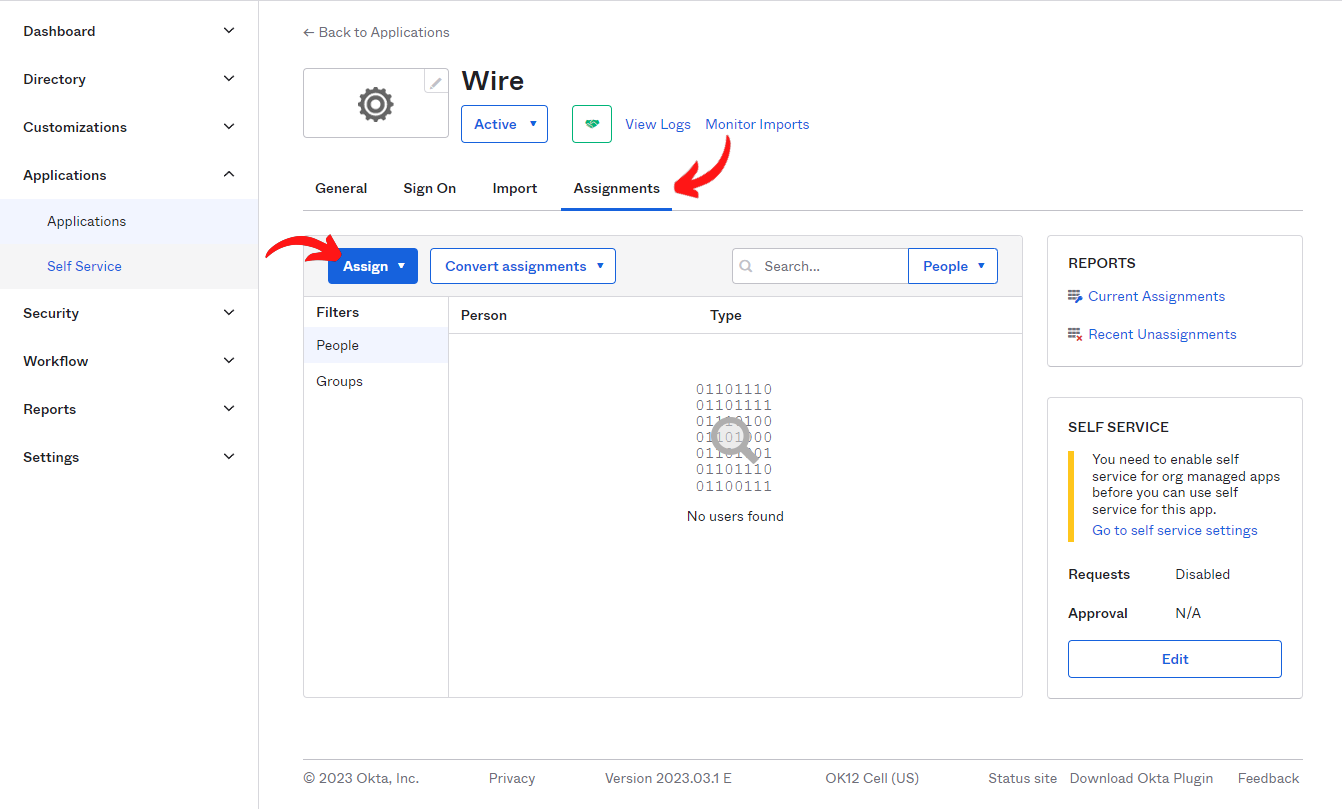
- Switch to the “Assignments” tab
- Make sure that some users (or everyone) is assigned to the application. These are the users that will be allowed to log in to Wire using Single Sign On. Add the relevant users to the list with the “Assign” button.