Troubleshooting during installation
Problems with CORS on the web based applications (webapp, team-settings, account-pages)
If you have installed wire-server, but the web application page in your browser has connection problems and throws errors in the console such as “Refused to connect to ‘https://assets.example.com’ because it violates the following Content Security Policies”, make sure to check that you have configured the CSP_EXTRA_ environment variables.
In the file that you use as override when running helm install/update -f <override values.yaml> (using the webapp as an example):
webapp:
   # ... other settings...
   envVars:
     # ... other environment variables ...
     CSP_EXTRA_CONNECT_SRC: "https://*.example.com, wss://*.example.com"
     CSP_EXTRA_IMG_SRC: "https://*.example.com"
     CSP_EXTRA_SCRIPT_SRC: "https://*.example.com"
     CSP_EXTRA_DEFAULT_SRC: "https://*.example.com"
     CSP_EXTRA_FONT_SRC: "https://*.example.com"
     CSP_EXTRA_FRAME_SRC: "https://*.example.com"
     CSP_EXTRA_MANIFEST_SRC: "https://*.example.com"
     CSP_EXTRA_OBJECT_SRC: "https://*.example.com"
     CSP_EXTRA_MEDIA_SRC: "https://*.example.com"
     CSP_EXTRA_PREFETCH_SRC: "https://*.example.com"
     CSP_EXTRA_STYLE_SRC: "https://*.example.com"
     CSP_EXTRA_WORKER_SRC: "https://*.example.com"
For more info, you can have a look at respective charts values files, i.e.:
Problems with ansible and python versions
If for instance the following fails:
ansible all -i hosts.ini -m shell -a "echo hello"
If your target machine only has python 3 (not python 2.7), you can tell ansible to use python 3 by default, by specifying ansible_python_interpreter:
# hosts.ini

[all]
server1 ansible_host=1.2.3.4


[all:vars]
ansible_python_interpreter=/usr/bin/python3
(python 3 may not be supported by all ansible modules yet)
Flaky issues with Cassandra (failed QUORUMs, etc.)
Cassandra is very picky about time! Ensure that NTP is properly set up on all nodes. Particularly for Cassandra DO NOT use anything else other than ntp. Here are some helpful blogs that explain why:
How can I ensure that I have correctly setup NTP on my machine(s)? Have a look at this ansible playbook
I deployed demo-smtp but I’m not receiving any verification emails
Check whether brig deployed successfully (brig pod(s) should be in state Running)
kubectl get pods -o wide
Inspect Brig logs
kubectl logs $BRING_POD_NAME
The receiving email server might refuse to accept any email sent by the demo-smtp server, due to not being a trusted origin. You may want to set up one of the following email verification mechanisms.
You may want to adjust the SMTP configuration for Brig (
wire-server/[values,secrets].yaml).
brig:
  config:
    smtp:
      host: 'demo-smtp'
      port: 25
      connType: 'plain'
brig:
  secrets:
    smtpPassword: dummyPassword
(Don’t forget to apply the changes with helm upgrade wire-server wire/wire-server -f values.yaml -f secrets.yaml)
I deployed demo-smtp and I want to skip email configuration and retrieve verification codes directly
If the only thing you need demo-smtp for is sending yourself verification codes to create a test account, it might be simpler and faster to just skip SMTP configuration, and simply retrieve the code internally right after it is sent, while it is in the outbound email queue.
To do this, click create a user/account/team, or if you already have, click on Resend Code:
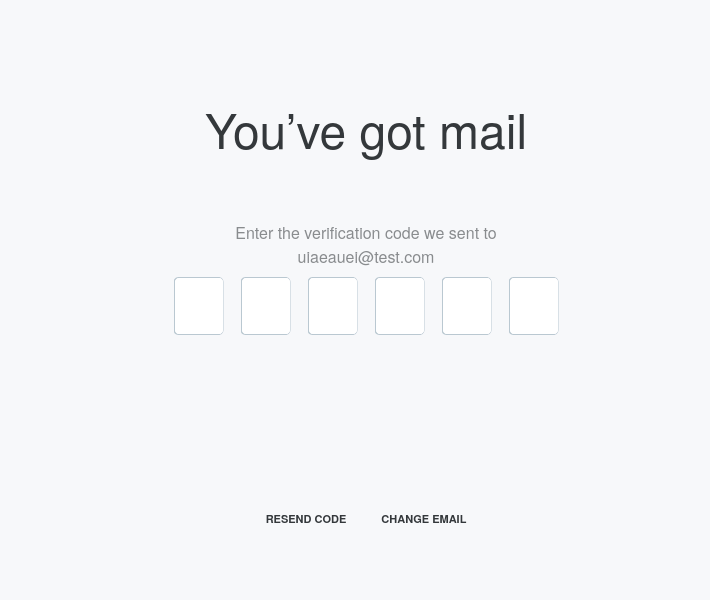
The code input interface
Then run the following command
kubectl exec $(kubectl get pod -lapp=demo-smtp | grep demo | awk '{print $1;}') -- sh -c 'cat /var/spool/exim4/input/* | grep -Po "^\\d{6}$" '
Or step by step:
Get the name of the pod
kubectl get pod -lapp=demo-smtp
Which will give you a result that looks something like this
> kubectl get pod -lapp=demo-smtp
NAME                         READY   STATUS    RESTARTS   AGE
demo-smtp-85557f6877-qxk2p   1/1     Running   0          80m
In which case, the pod name is demo-smtp-85557f6877-qxk2p, which replaces <name of pod> in the next command.
Then get the content of emails and extract the code
kubectl exec <name of pod> -- sh -c 'head -n 15 /var/spool/exim4/input/* '
Which will give you the content of sent emails, including the code
> kubectl exec demo-smtp-85557f6877-qxk2p -- sh -c 'head -n 15 /var/spool/exim4/input/*  '
==> /var/spool/exim4/input/1mECxm-000068-28-D <==
1mECxm-000068-28-D
--Y3mymuwB5Y
Content-Type: text/plain; charset=utf-8
Content-Transfer-Encoding: quoted-printable
[https://wire=2Ecom/p/img/email/logo-email-black=2Epng]
VERIFY YOUR EMAIL
myemail@gmail=2Ecom was used to register on Wire=2E Enter this code to v=
erify your email and create your account=2E
022515
This means the code is 022515, simply enter it in the interface.
If the email has already been sent out, it’s possible the queue will be empty.
If that is the case, simply click the “Resend Code” link in the interface, then quickly re-send the command, a new email should now be present.
Obtaining Brig logs, and the format of different team/user events
To obtain brig logs, simply run
kubectl logs $(kubectl get pods | grep brig | awk '{print $1;}' | head -n 1)
You will get log entries for various different types of events that happen, for example:
User creation
{"user":"24bdd52e-af33-400c-8e47-d16bf8695dbd","request":"c0575ff5a2d61bfc2be21e77260fccab","msgs":["I","Creating user"]}
Activation key creation
{"activation.code":"949721","activation.key":"p8o032Ljqhjgcea9R0AAnOeiUniGm63BrY9q_aeS1Cc=","request":"c0575ff5a2d61bfc2be21e77260fccab","msgs":["I","Activating"]}
Activation of a new user
{"user":"24bdd52e-af33-400c-8e47-d16bf8695dbd","request":"c0575ff5a2d61bfc2be21e77260fccab","msgs":["I","User activated"]}
User indexing
{"user":"24bdd52e-af33-400c-8e47-d16bf8695dbd","logger":"index.brig","msgs":["I","Indexing user"]}
Team creation
{"email_sha256":"a7ca34df62e3aa18e071e6bd4740009ce7a25278869badc1ad8f6afda792d427","team":"6ef03a2b-34b5-4b65-8d72-1e4fc7697553","user":"24bdd52e-af33-400c-8e47-d16bf8695dbd","module":"Brig.API.Public","fn":"Brig.API.Public.createUser","request":"c0575ff5a2d61bfc2be21e77260fccab","msgs":["I","Sucessfully created user"]}
Invitation sent
{"invitation_code":"hJuh1C1PzMkgtesAYZZ4SZrP5xO-xM_m","email_sha256":"eef48a690436699c653110387455a4afe93ce29febc348acd20f6605787956e6","team":"6ef03a2b-34b5-4b65-8d72-1e4fc7697553","module":"Brig.Team.API","fn":"Brig.Team.API.createInvitationPublic","request":"c43440074629d802a199464dd892cd92","msgs":["I","Succesfully created invitation"]}